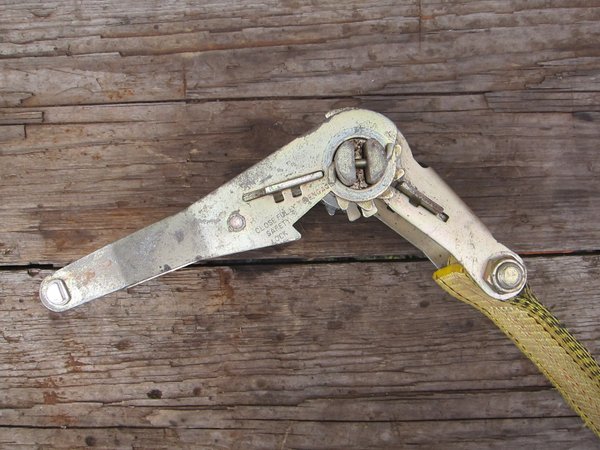
How To Use a Ratchet Strap
We use ratchet straps all the time in the 4x4 world and out of it - securing canoes and kayaks, lashing lumber, clamping steel for fab work, and kludging together trail breakage.
As common as they are, ratchet straps are pretty confusing to use for some people and may have a feature or two you didn't know about.
Also:
We see people flying down the highway all the time without the ratchet locked!
So here are a few tips on using ratchet straps and releasing ratchet straps when they get stuck.
- How to Release a Jammed Ratchet Strap
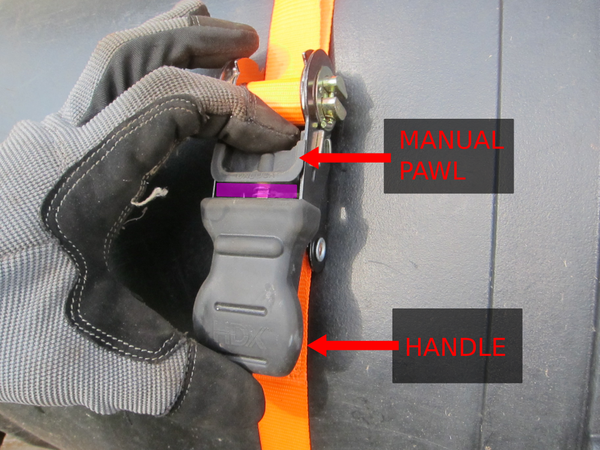
- a gear
- a manual pawl - you move it
- an automatic pawl - it moves itself
- Ratcheting - You can tighten it.
- Loosening
- The ratchet is spread all the way open until the auto pawl rests on
the cam. To loosen, you squeeze the manual pawl and pull the
strap.
- Locked - When it's tight, close the ratchet completely and make sure auto and manual pawls engage. This will keep it from opening.
- Make the ratchet an angle (it only angles one way)
- Feed the strap through the axle and back out
Ratchet Strap Basics

At least one of the pawls is engaged when tightening. Neither pawl is engaged in loosening.
All ratchet straps work the same way using a ratchet mechanism.
But while a typical ratchet mechanism uses a gear and a single pawl, a ratchet strap uses:
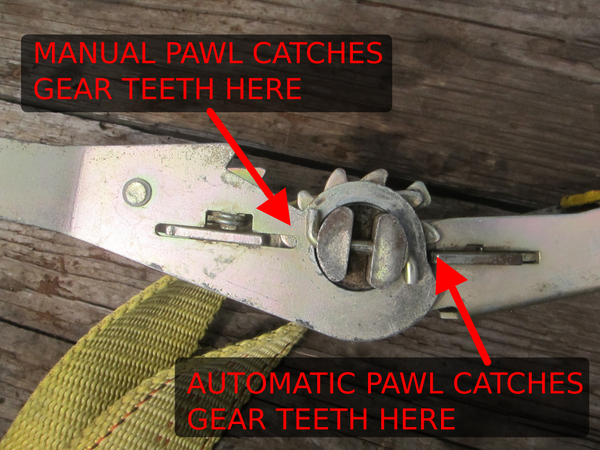
One pawl has a handle (for you), the other moves by itself.
When you tighten a ratchet strap, at least one of the pawls is engaged with the gear teeth.
When you loosen a ratchet strap, neither pawl is engaged. So, when a ratchet strap is stuck, usually you just haven't disengaged the pawls. More on that below.
The 3 Important Ratchet Strap Postions
Ratchet straps are generally in one of these positions:
In this position you can move the handle back and forth to tighten the strap.
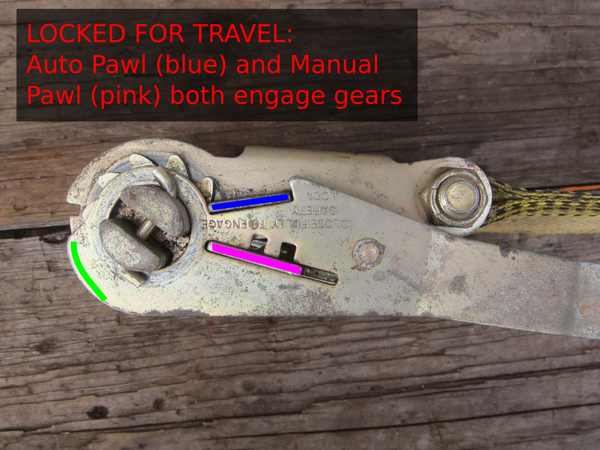
The auto pawl (blue) and manual pawl (pink) both engage the ratchet gears when the mechanism is completely closed. This is the position it should be in for travel!
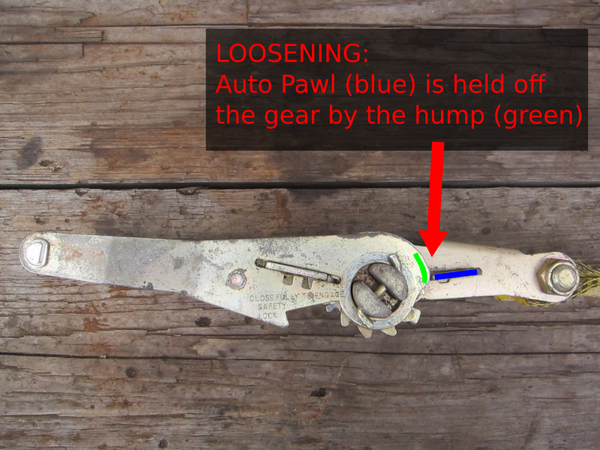
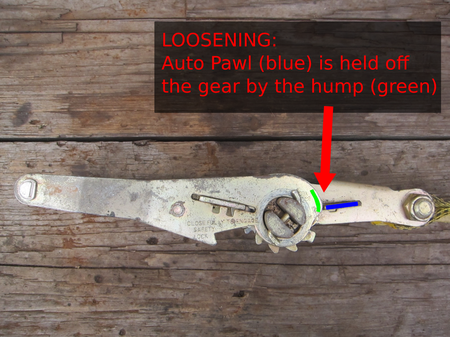
When the auto pawl (blue) is disengaged from the gears by the hump (green), you can squeeze the manual pawl and loosen the strap.
To get the ratchet into these positions, you need to either squeeze the manual pawl handle or swing the bar.
You can: 1) Squeeze the manual pawl handle to disengage it from the gear. 2) Move the ratcheting bar back and forth.
A common ratchet strap problem is getting it to release. Usually, you just need to squeeze the manual pawl bar and keep making the ratchet flatter.
Compare the position of the blue pawl to the green hump in the images below.
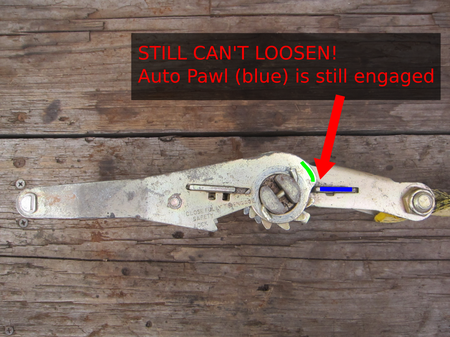
The blue pawl needs to be up on the hump. Squeeze the manual pawl handle and open the ratchet until it's completely flat!
The ratchet is totally flat and the blue pawl is in the correct position.
How to Thread a Ratchet Strap
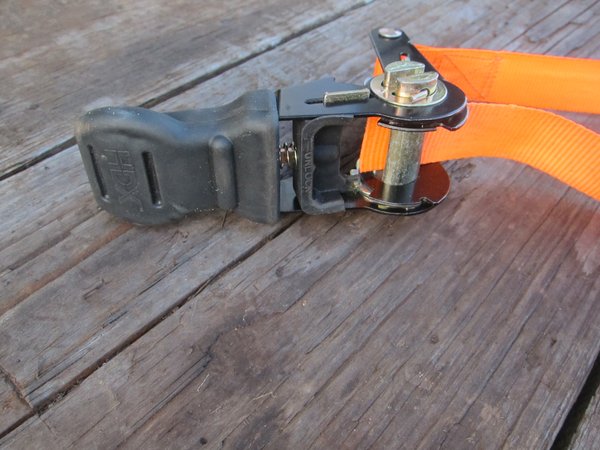
Pass the strap end through the slot and pull it through.
An easy way to thread a ratchet strap is to visualize the "greater than" and "less than" signs with their points touching, like this: ><. To make this shape with the ratchet strap:

Notice the "greater than" (pink) and "less than" (green) signs made by the ratchet and strap ends. The hooks should end up on the same side.
How to Tighten a Ratchet Strap
To use the ratchet strap take all the above information and put it into practice:
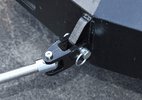
1) Attach the hooks to secure points and position the strap.
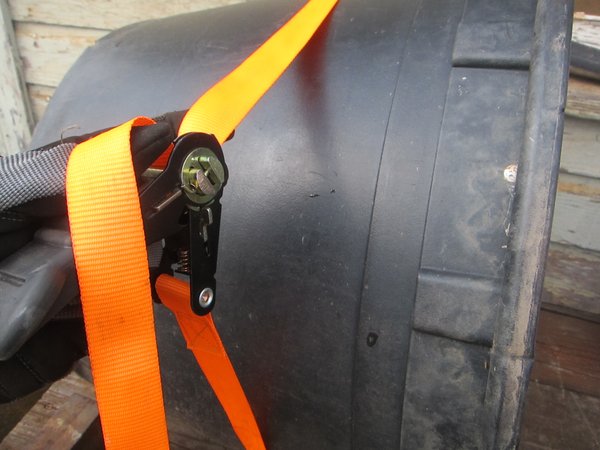
Get the hooks secure.
2) Pull almost all the slack out of the strap so that the strap is taut. Sometimes we'll leave a little slack if the thing we're tightening doesn't have a lot of "give".
Grab the end without hooks and pull the slack out of it. It's okay to have a little slack, but too much will jam the ratchet.
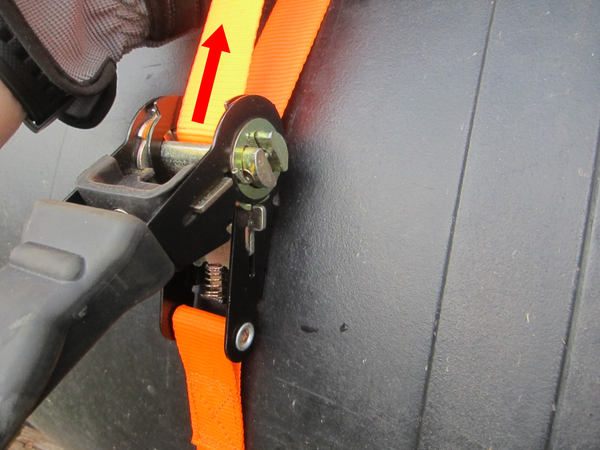
3) Start ratcheting the bar up and down. Don't squeeze the manual pawl - you'll use it to release the ratchet strap later, but it needs to be able to move freely right now.
Move it up and down, tightening the strap.
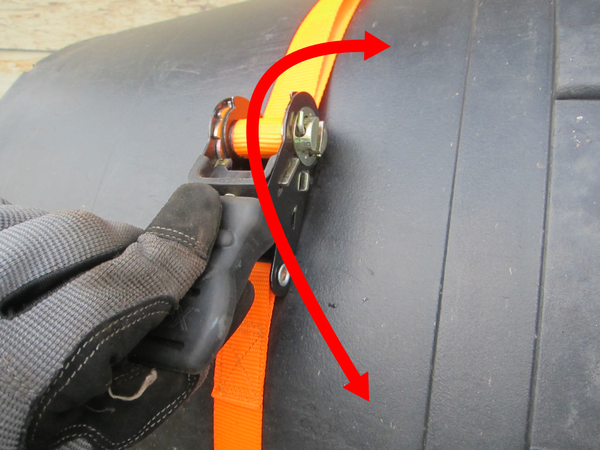
4) Get it tight enough. Be careful not to damage the thing you're tightening against. Make sure your hooks haven't slipped!
Make sure the strap that builds up on the axle doesn't get super fat, or the strap could jam.
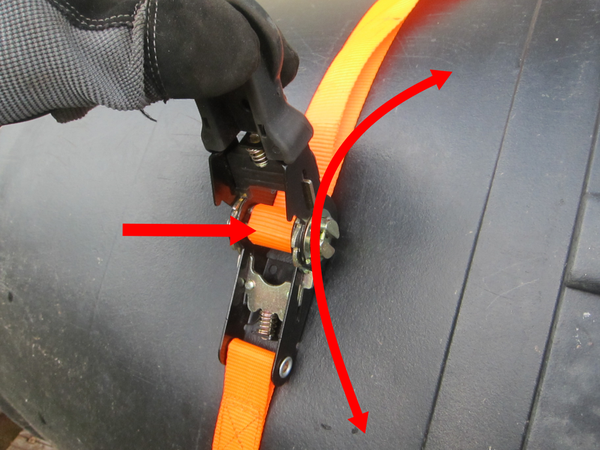
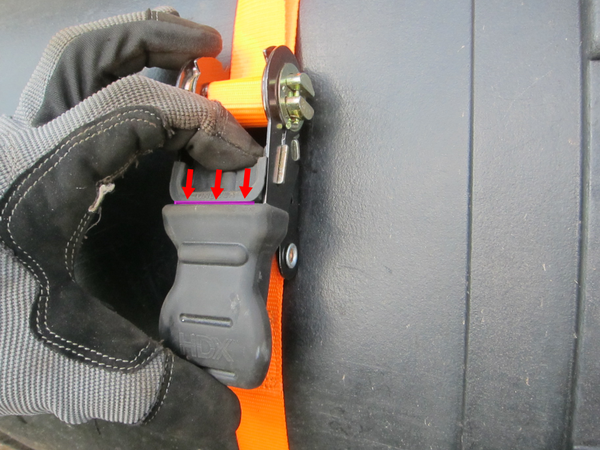
5) "Close" the ratchet and lock the bar in position. In this position the auto pawl can't back out and the manual pawl acts like a failsafe. This is the only way to safely travel with your ratchet strap.

Pull the handle down all the way. The manual pawl (pink) and auto pawl (blue) should go into position. In this position the ratchet strap is safe for travel.
How to Loosen a Ratchet Strap
If you have trouble loosening your ratchet strap, go up and take a look at the "loosening" position above. You can't loosen it if it isn't in that position!
1) The ratchet should be in the locked position. Get ready to squeeze the manual pawl.
Get ready to squeeze the manual pawl.
2) Squeeze the manual pawl. This will unlock the ratchet - you still need to disengage the auto pawl.
This is the first part of unlocking the ratchet strap.
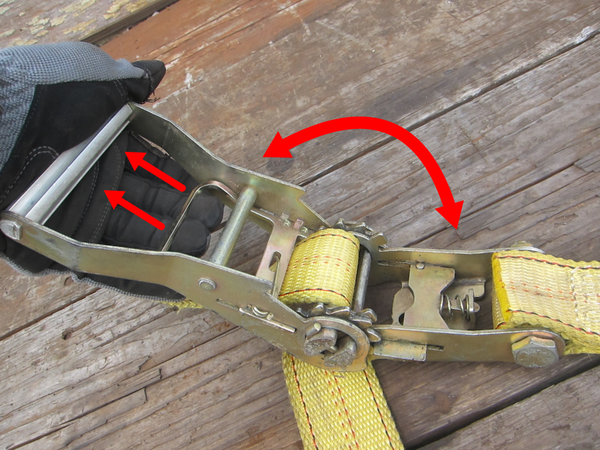
3) Keep squeezing the manual pawl and swing the bar up as far as you can. This won't work if you don't squeeze the manual pawl.
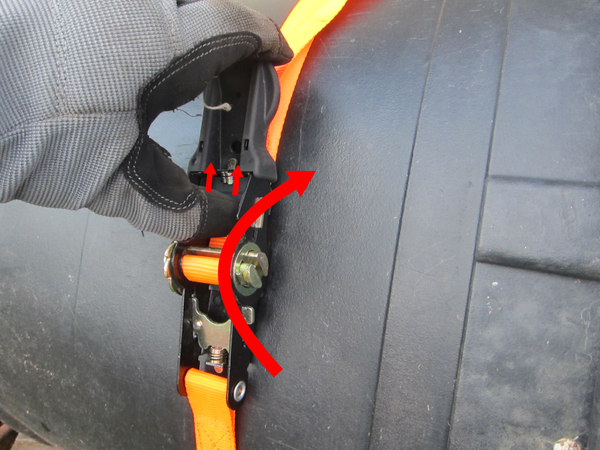
Continue to squeeze the manual pawl, and swing the bar up as far as possible.
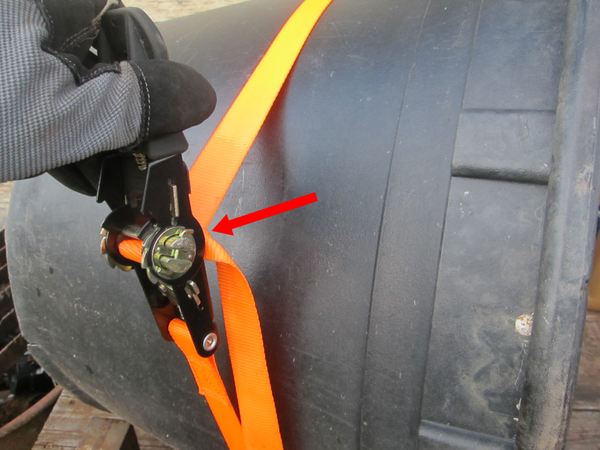
4) Make sure the ratchet is completely flat. If you did it right, the strap will pop a little! If it didn't pop, then the auto pawl is still engaged.

Make sure that you make the two halves nearly flat! When properly positioned, you won't be able to pull the handle back down - it will be locked in its flat position.
5) Pull the ratchet toward you to get slack. All done! Now you can pull the strap off.
Pull the ratchet strap towards you.
Last updated: September 5, 2019