Removing the Passenger Side Dashboard in Your Early Toyota Pickup or 4Runner
The hidden bolts are a total pain in the ace if you don't have a factory manual.
The Windshield Nut
There is a nut quite close to the windshield that you need to loosen. The stud for the nut is attached to the dash pad and slides into a slot on the dash support. To get at the nut:
1. Remove the glovebox
Open the glovebox and pop off the vinyl cover holder. There are three arrows pointing at the plastic pins that hold the cover in place. Slide a flat blade screwdriver under the plastic at each pin and pop it off. Then unscrew the two screws that hold the bottom of the glovebox on.
2. Find the sight hole.
Look through the sight hole and you’ll see the nut. Shine a light from below if you’re having trouble seeing it, but it’s pretty obvious once you look through the hole.
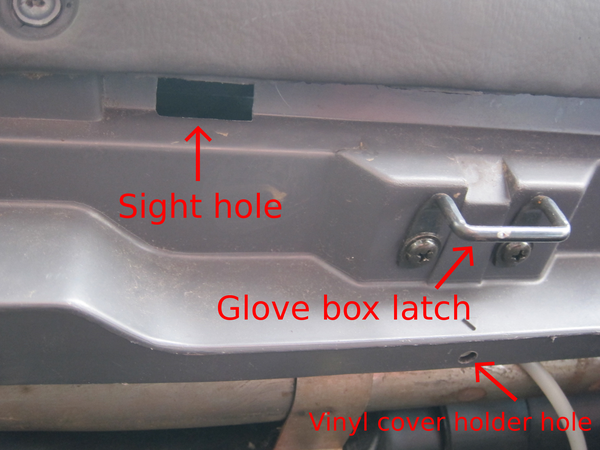
Through the rectangular sight hole you can see the windshield nut. You may need to shine a light from underneath to see the nut. You can also see one of the holes that mounts the vinyl cloth cover which runs from the dashboard down to the top of the glovebox.
3. Loosen the nut.
The nut is 10mm. Use a 10mm deep socket with 6-9” of extension with
your socket wrench.
You only need to loosen the nut to slip off the dash pad since the hole is notched. When you put the pad back on you may want to twist it off a few more turns so that you have more room to work. While you can take the nut off all way, you won’t lose it if you just leave it on there.
And that’s it for the dash pad nut. But you’ll still have one more tricky bolt:
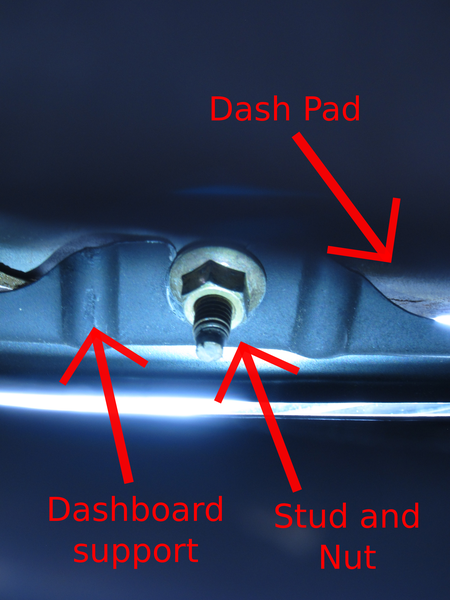
This is what you see when you look through the sight hole. From the sight hole you'll be looking up at the nut. Thus, this image is the bottom of the dash pad. Everything in the upper part of this picture is part of the dash pad. The ribbed metal is the dashboard support. The light coming through is the windshield. The support is slotted to accept the stud on the dashpad.
The Passenger Side Vent Bolt
The bolt is behind the passenger side dashboard vent, which means that you have to remove the vent in order to remove the bolt.
1. Remove the passenger side vent.
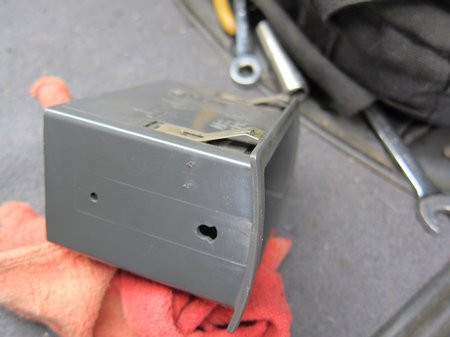
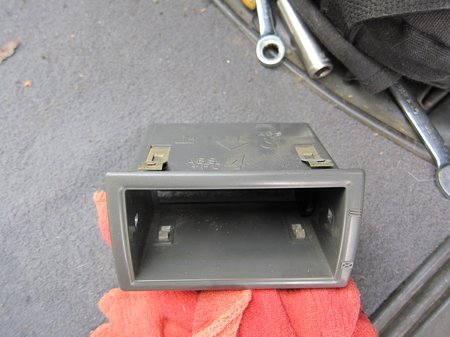
The clips hold the vent in place against a metal cutout. The visible metal clips here need to be pressed down toward the vent with a small flat-bladed screwdriver.
The vent has 4 clips. The top two need to be pressed down. The bottom two need to be pressed up.
To get the vent out, you need to press in on the metal clips that hold it in place and try to shimmy/pull it out a little bit. Once the clips have fully released, you can pull the vent straight out.
2. Remove the bolt.
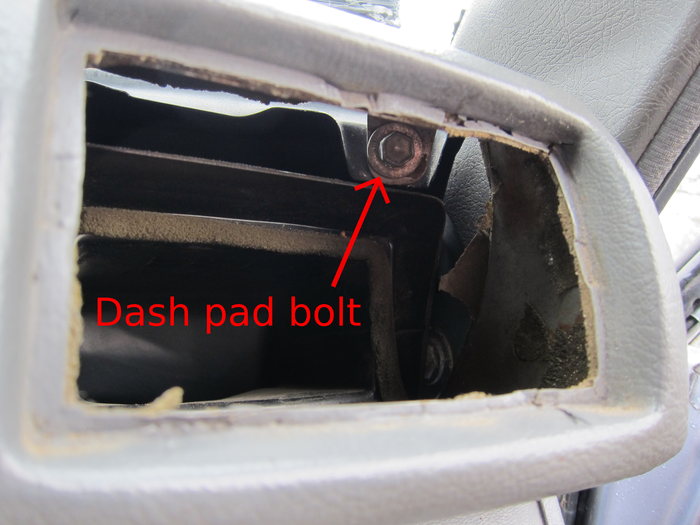
The dash pad bolt is easily visible once the vent has been removed. Unbolt this with a 10mm socket.
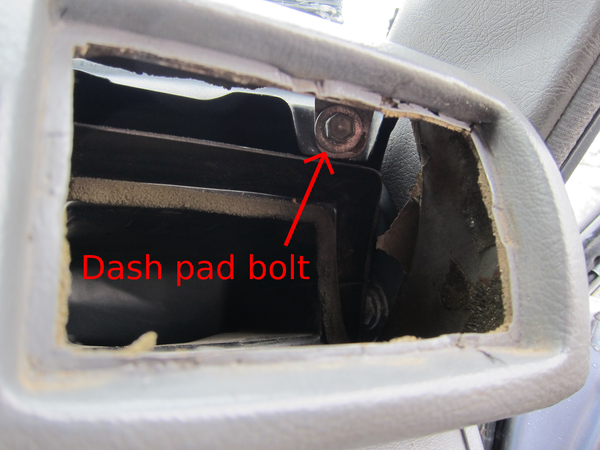
Once your Toyota's passenger side vent is removed, you can see the bolt that holds the dash pad on to the dashboard support.
Once the passenger side vent bolt is removed, the hard part is done! You’ll still have to remove some other screws to get the dash pad off but they are very visible, unlike the two pieces of hardware you just took off. Good luck!
Last updated: June 3, 2019
